2020
2019
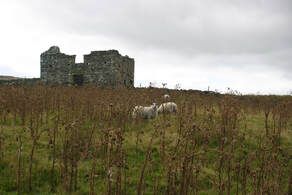
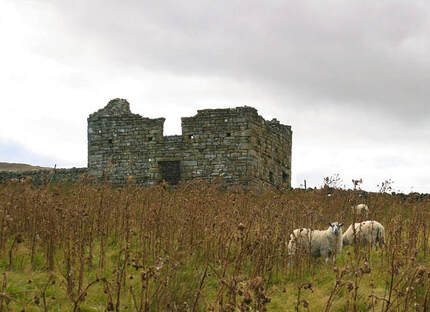
Sheep
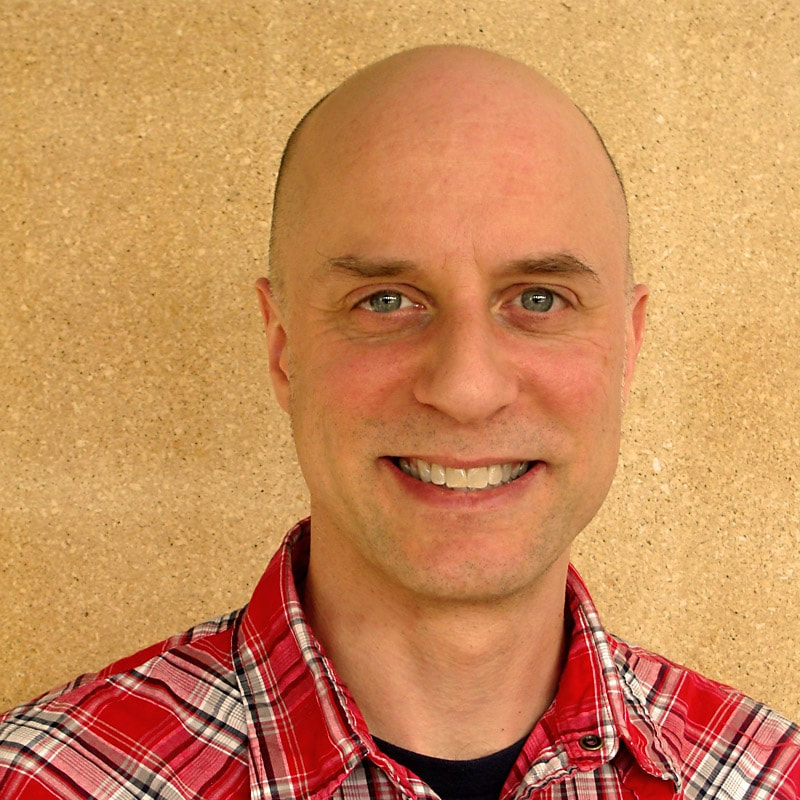
Unedited Man (Before)
|
To attempt to create a more visually appealing photo from the original photo I first brought the photo into Lightroom. In Lightroom I cropped the photo, making the sheep and castle in the background better focal points in the composition. After I was happy with how I cropped the photo I adjusted the white balance in the photo. After that I also decided to adjust the clarity, exposure, contrast, whites, blacks, highlights, shadows, and vibrance of the colours. I also added a tone curve slightly bringing out the greens and greys in the photo. This, in my opinion gave the photo more visual appeal.
|
Edited Man (After)
|
|

|
The first thing was edited in this photo was the white balance, this made the photo have less of an orange tone to it. We then used the teeth whitening tool and whiten his teeth as while as the whites of his eyes, and also to get rid of the redness on his cheeks, chin, and forehead. For wrinkles, blemishes, and more redness around his face we used the spot removal tool. We also used this same tool to get rid of a few grey hairs in his eyebrows. The brush tool, set to saturation, was used over the iris of the eyes. We then brighten his blue eyes by adjusting the temperature, and as well sharpened it so there could be more detail. The last thing we did was increase the exposure on the entire photo which made the man's skin brighter. These are the Before and After photos.
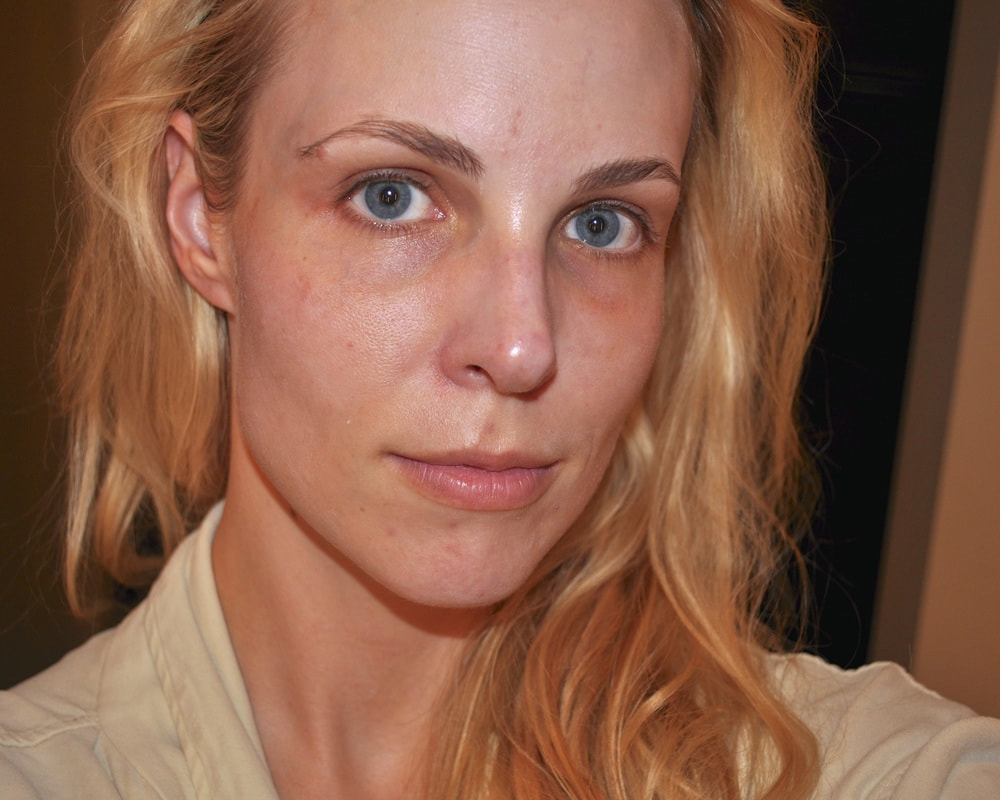
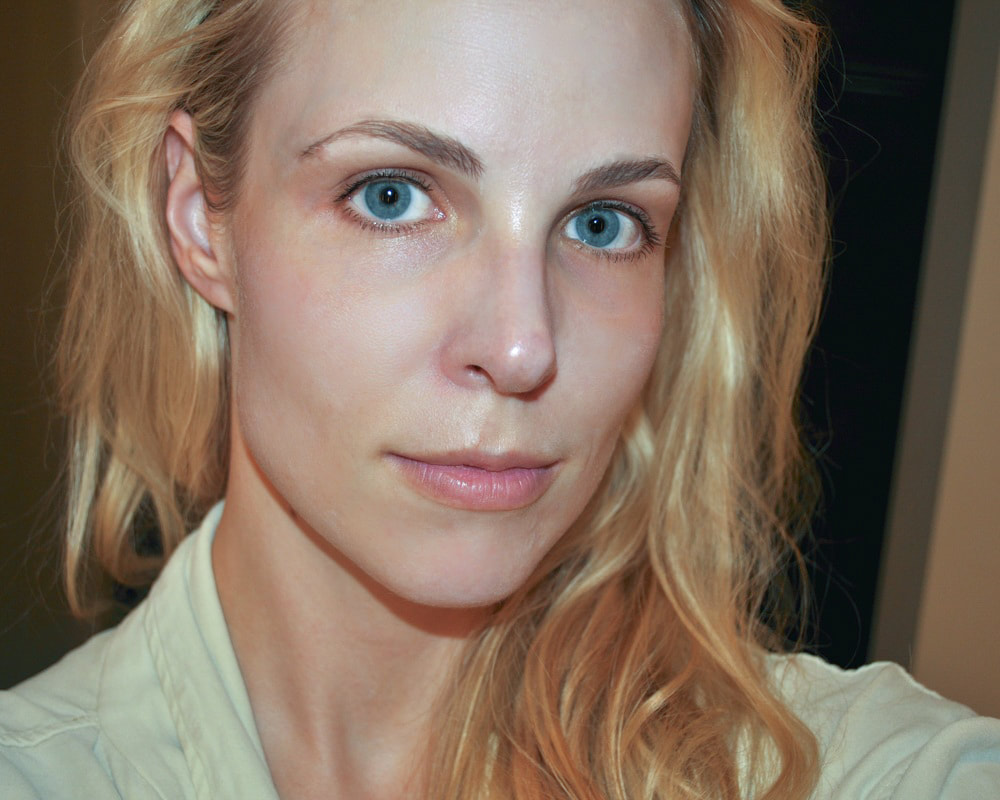
Unedited Lady
|
Edited Lady
|
|
|
To fix the photo we first corrected the white balance, which lessened the yellow and greyish tinge the photo previously had. We then used the spot healing tool and cleared her blemishes, including on her forehead, nose, and cheeks. We as well soften her skin and evened out the colour and as well reduced the visibility of her pores. We then used the shadow and skin softening tool to reduce the bags under her eyes. The shadow tools was also used to contour her face, specifically in on her cheekbones to darken them. The highlighting tool was then used in order to brighten areas of her face, including her cheeks, forehead, nose, cupid's bow, and chin. We also used the saturation tool in order to slightly bring out the pink colouring in her lips. The burn tool was then used in order to darken her pupils and to darken, lengthen, and add more detail to her eyelashes. We also used the burn tool the slightly fill in the bald spots in her eyebrows. These are the Before and After photos.
To fix the photo we first corrected the white balance, which lessened the yellow and greyish tinge the photo previously had. We then used the spot healing tool and cleared her blemishes, including on her forehead, nose, and cheeks. We as well soften her skin and evened out the colour and as well reduced the visibility of her pores. We then used the shadow and skin softening tool to reduce the bags under her eyes. The shadow tools was also used to contour her face, specifically in on her cheekbones to darken them. The highlighting tool was then used in order to brighten areas of her face, including her cheeks, forehead, nose, cupid's bow, and chin. We also used the saturation tool in order to slightly bring out the pink colouring in her lips. The burn tool was then used in order to darken her pupils and to darken, lengthen, and add more detail to her eyelashes. We also used the burn tool the slightly fill in the bald spots in her eyebrows. These are the Before and After photos.
